Your First Trip - Complete Tutorial
This comprehensive tutorial will walk you through creating your first complete trip in Organize It. We'll create a 3-day weekend trip to Rome as an example.
Prerequisites
Before starting this tutorial, make sure you:
- Have installed Organize It (see Installation Guide)
- Have created an account and are logged in
- Have the development server running
Tutorial Overview
In this tutorial, you will:
- Create a new trip to Rome
- Add a hotel stay
- Add arrival and departure transfers
- Add experiences (activities)
- Add meals (restaurants)
- View and organize your complete itinerary
Let's get started!
Step 1: Create a New Trip
1.1 Navigate to Trip Creation
From the homepage, click the Create New Trip button.
1.2 Fill in Trip Details
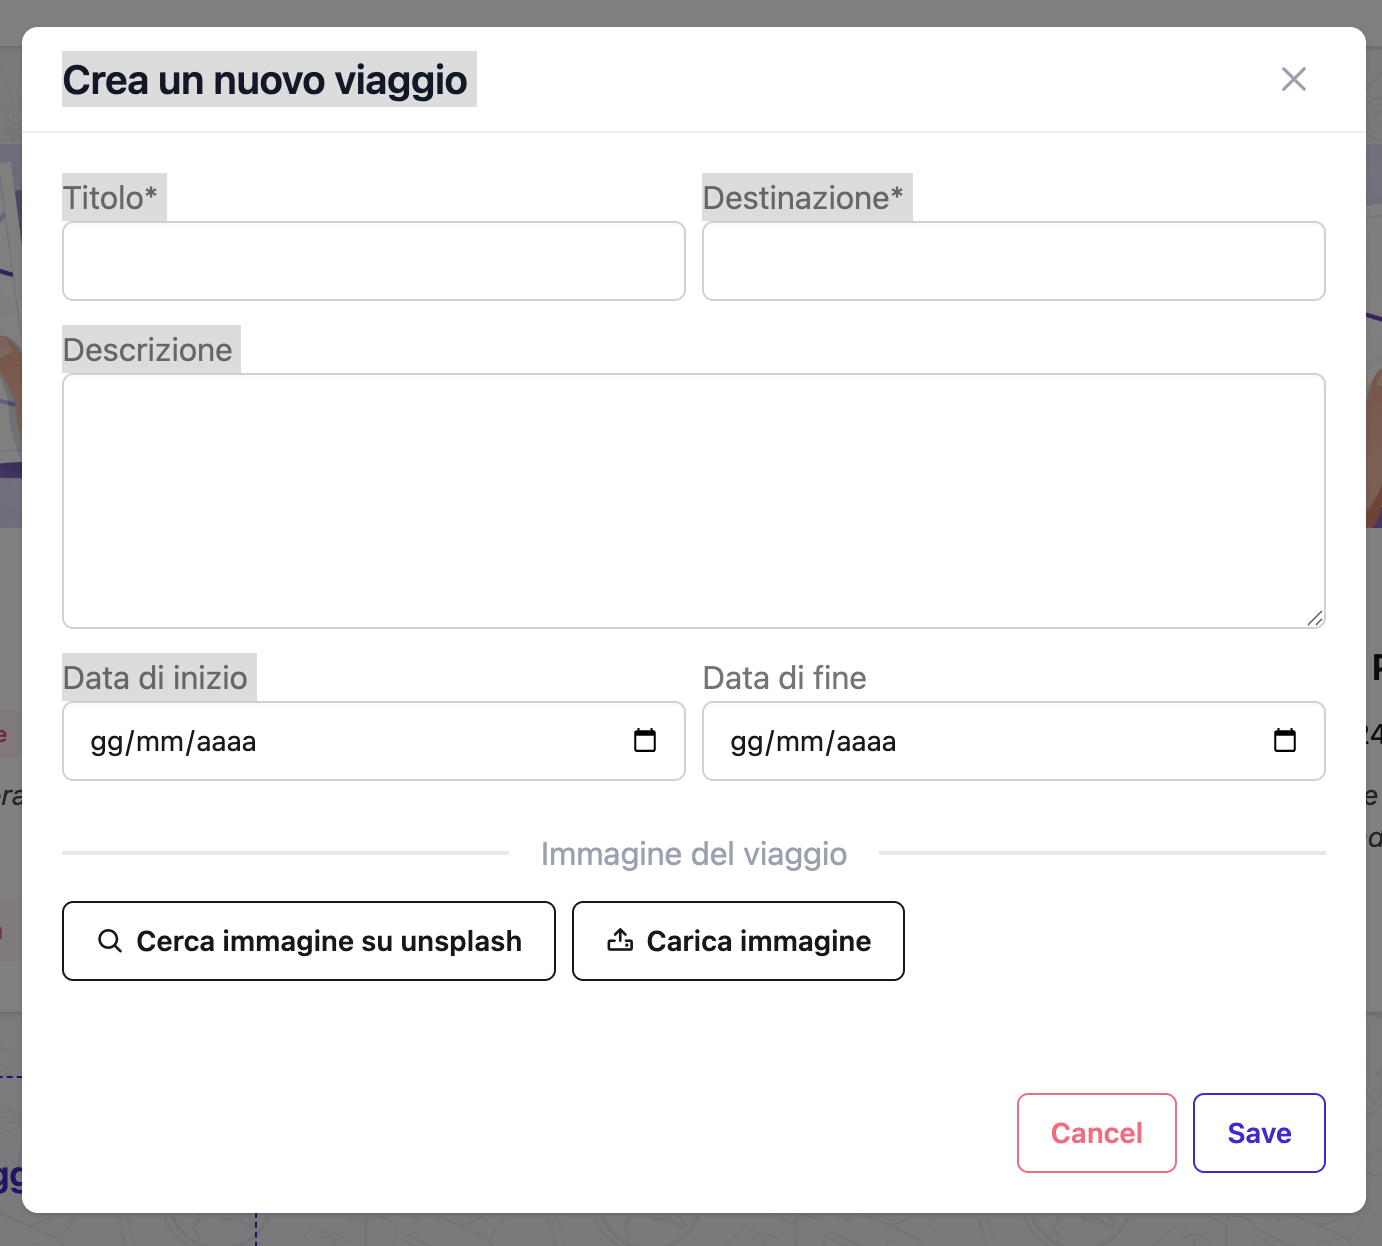 The trip creation form
Enter the following information:
- Name: "Rome Weekend Getaway"
- Destination: "Rome, Italy"
- Start Date: Choose a Friday (e.g., March 14, 2025)
- End Date: Choose a Sunday (e.g., March 16, 2025)
- Description: "A wonderful weekend exploring ancient Rome"
1.3 Add a Cover Image
You have two options:
Option A: Upload Your Own Image
Click Upload Image and select a photo from your computer.
Option B: Search Unsplash (Recommended)
- Click Search Unsplash
- Type "rome colosseum" in the search box
- Click on an image you like
- Click Use This Photo
1.4 Save the Trip
Click Save to create your trip.
Success
Your trip is now created! Notice that 3 days (Friday, Saturday, Sunday) have been automatically generated.
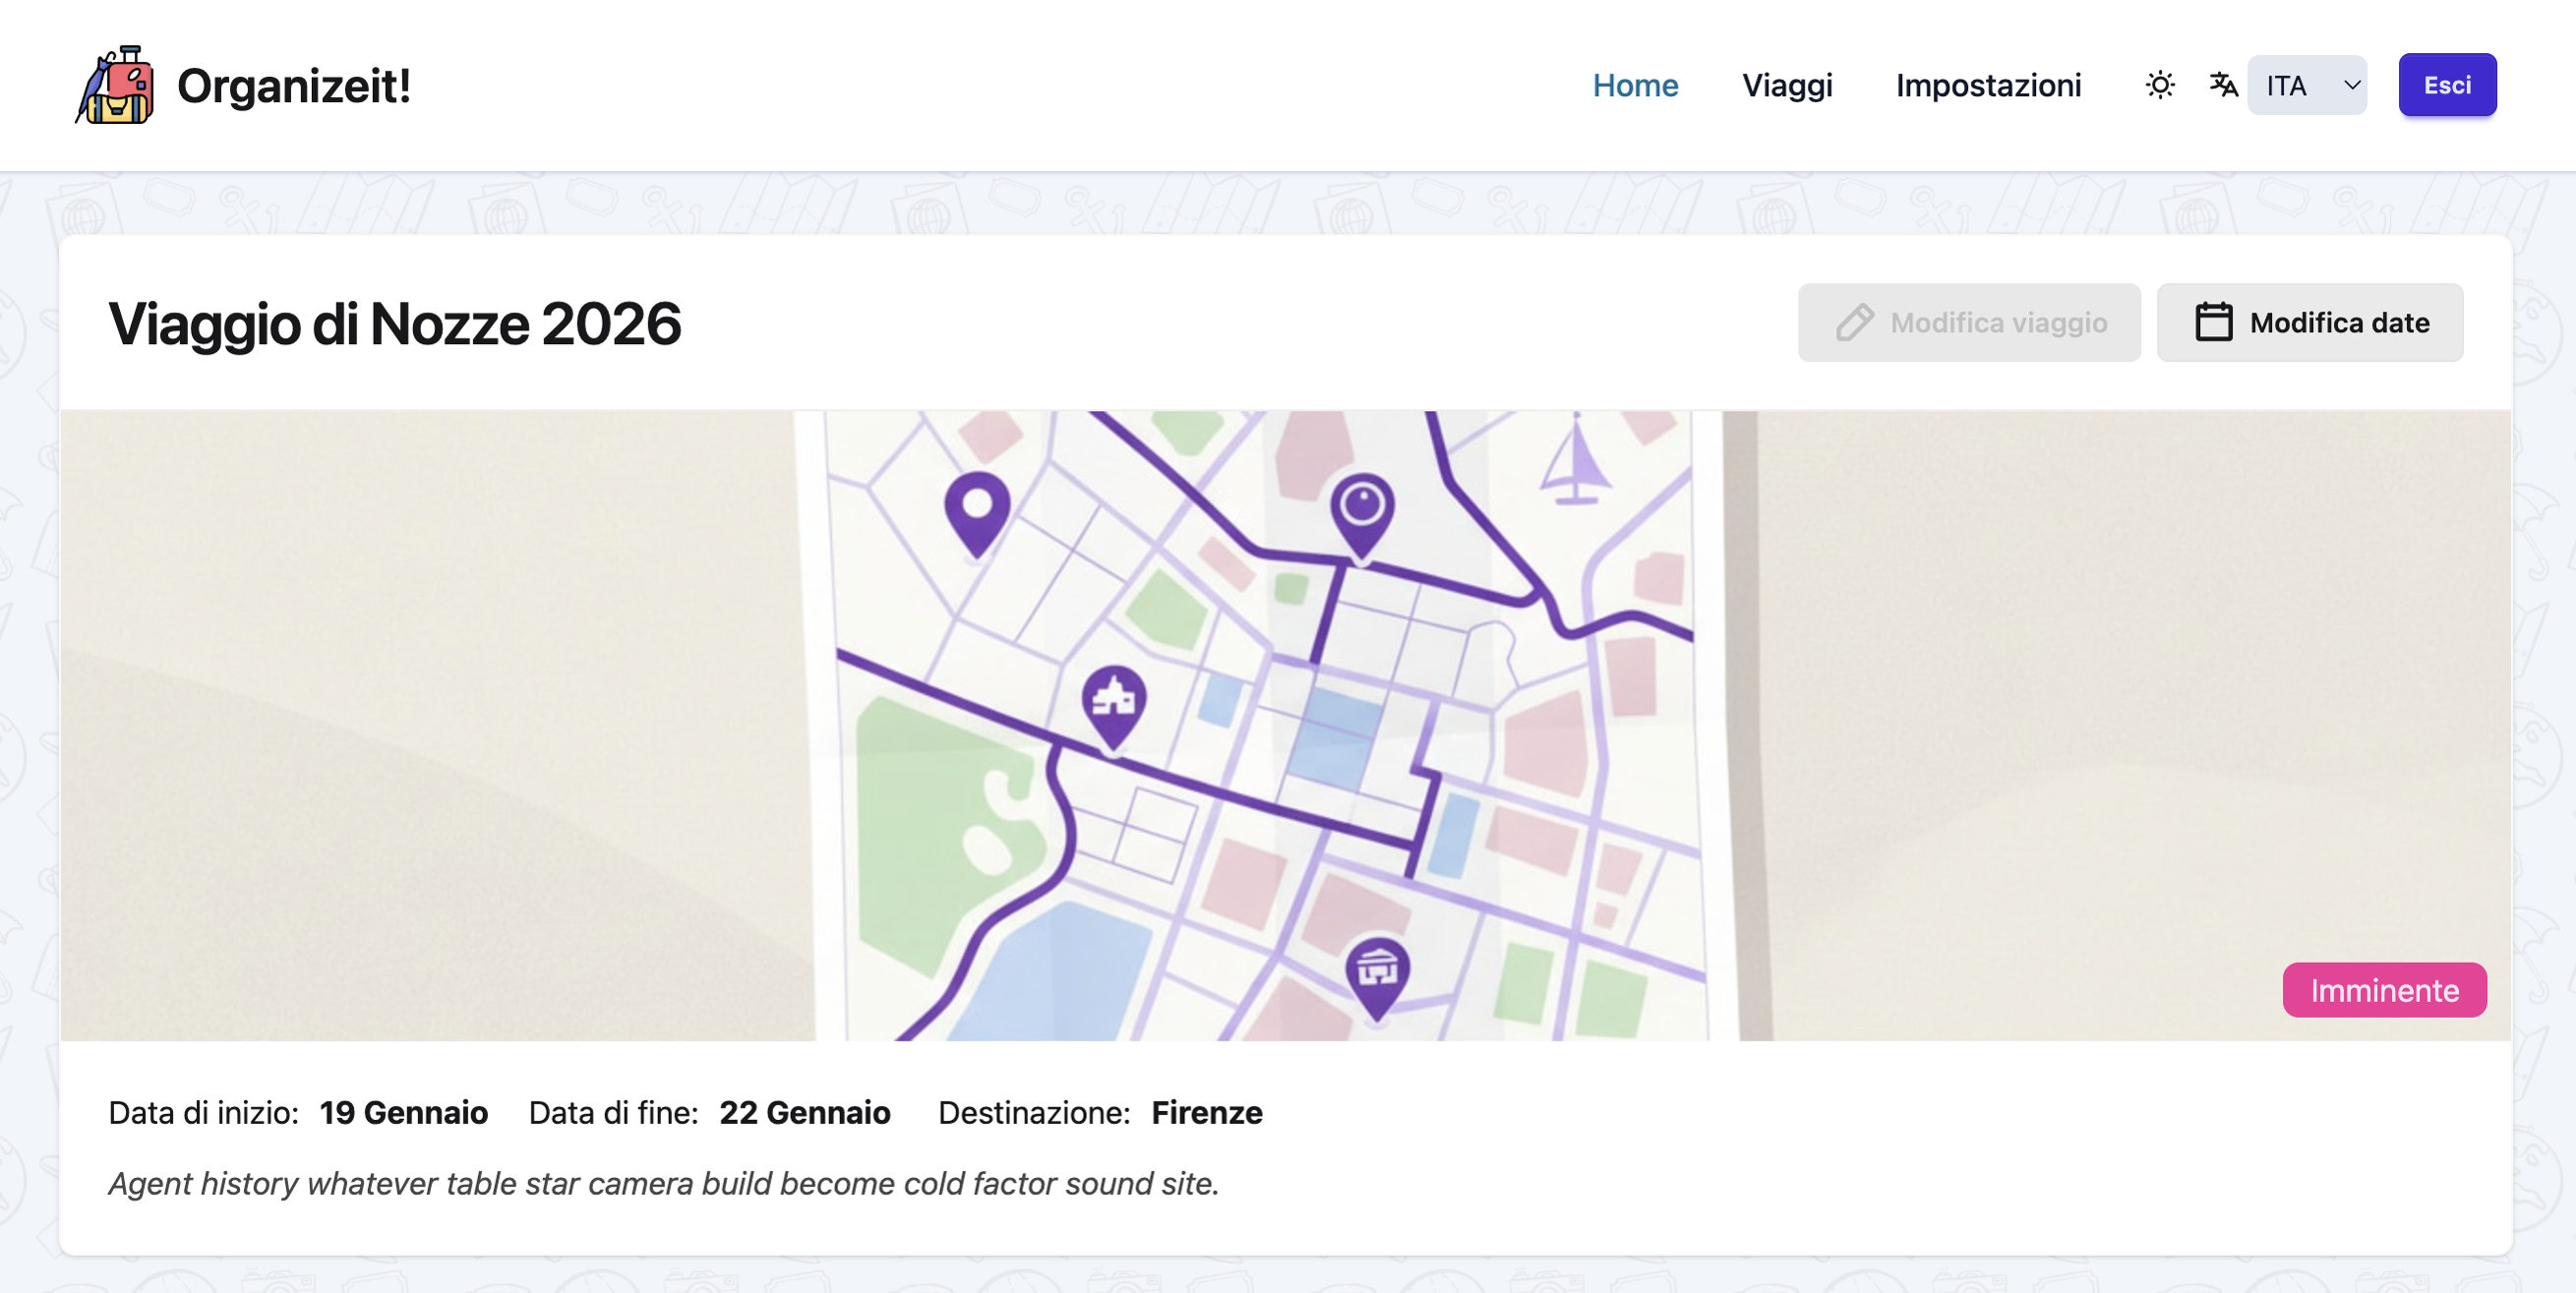 Your trip with automatically generated days
Step 2: Add Your Accommodation
2.1 Navigate to the First Day
Click on Day 1 (Friday, March 14) to open the day view.
2.2 Create a Stay
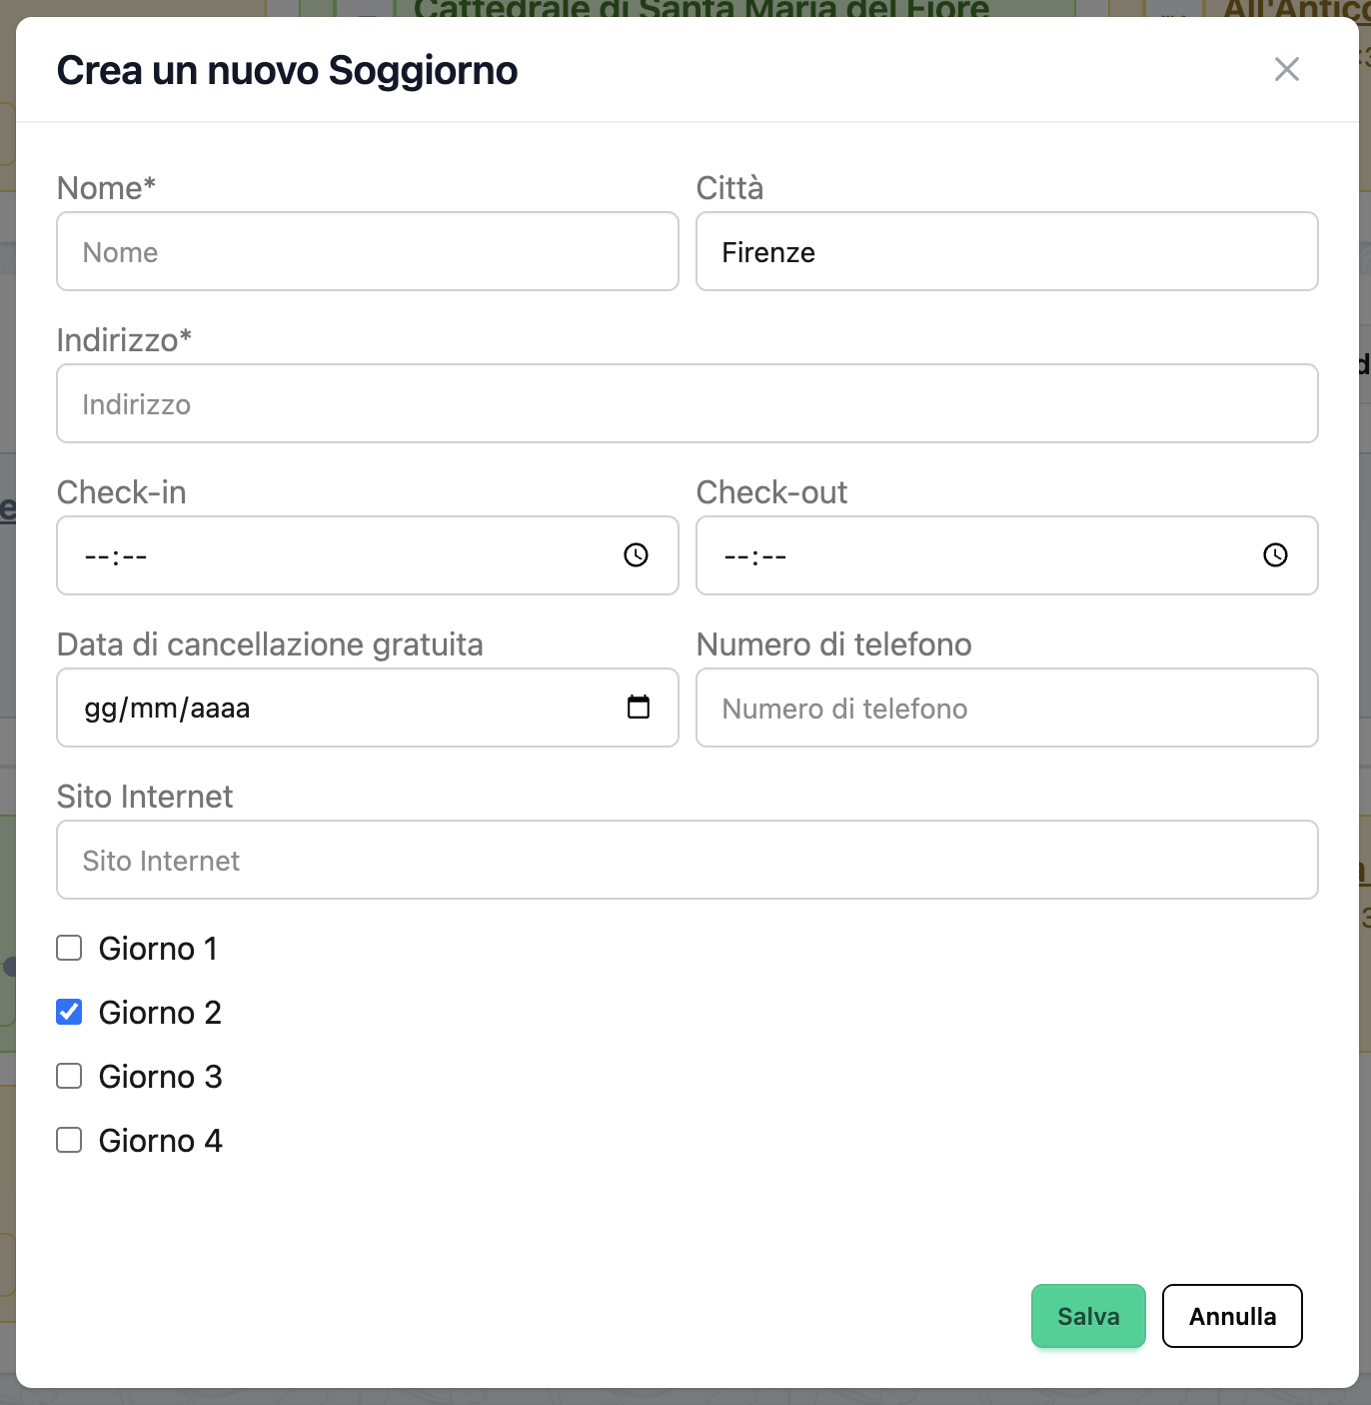 The stay creation form
- Click Add Stay
- Fill in the stay details:
- Name: "Hotel Forum Roma"
- Address: "Via Tor de' Conti, 25, 00184 Rome, Italy"
- Start Day: Day 1 (Friday)
- End Day: Day 3 (Sunday)
- Check-in Time: 15:00
- Check-out Time: 11:00
- Confirmation Number: "HTLFORUM123" (optional)
-
Notes: "Near the Colosseum. Free breakfast included."
-
Click Save
Multi-Day Stays
Since this stay spans all 3 days, it will appear on Day 1, Day 2, and Day 3.
2.3 Enrich with Google Places (Optional)
If you have a Google Places API key configured:
- Click Enrich next to the stay
- The system will automatically fetch:
- Website URL
- Phone number
- Opening hours
- Additional details
Step 3: Add Arrival Transfer
3.1 Create the Arrival Transfer
- From Day 1, click Add Transfer
- Select Arrival as the transfer type
- Fill in details:
- Transport Mode: Flight
- Origin: "London Heathrow (LHR)"
- Destination: "Rome Fiumicino (FCO)"
- Departure Time: 08:00
- Arrival Time: 11:30
- Confirmation Number: "BA123456"
-
Notes: "British Airways BA500. Seat 12A."
-
Click Save
3.2 Add Airport to Hotel Transfer
- Click Add Transfer again
- Select Simple Transfer
- Fill in details:
- Transport Mode: Train
- Origin: "Fiumicino Airport"
- Destination: "Hotel Forum Roma"
- Departure Time: 12:00
- Arrival Time: 13:00
-
Notes: "Leonardo Express to Termini, then metro to Colosseo"
-
Click Save
Step 4: Add Experiences (Activities)
4.1 Friday Afternoon - Colosseum Visit
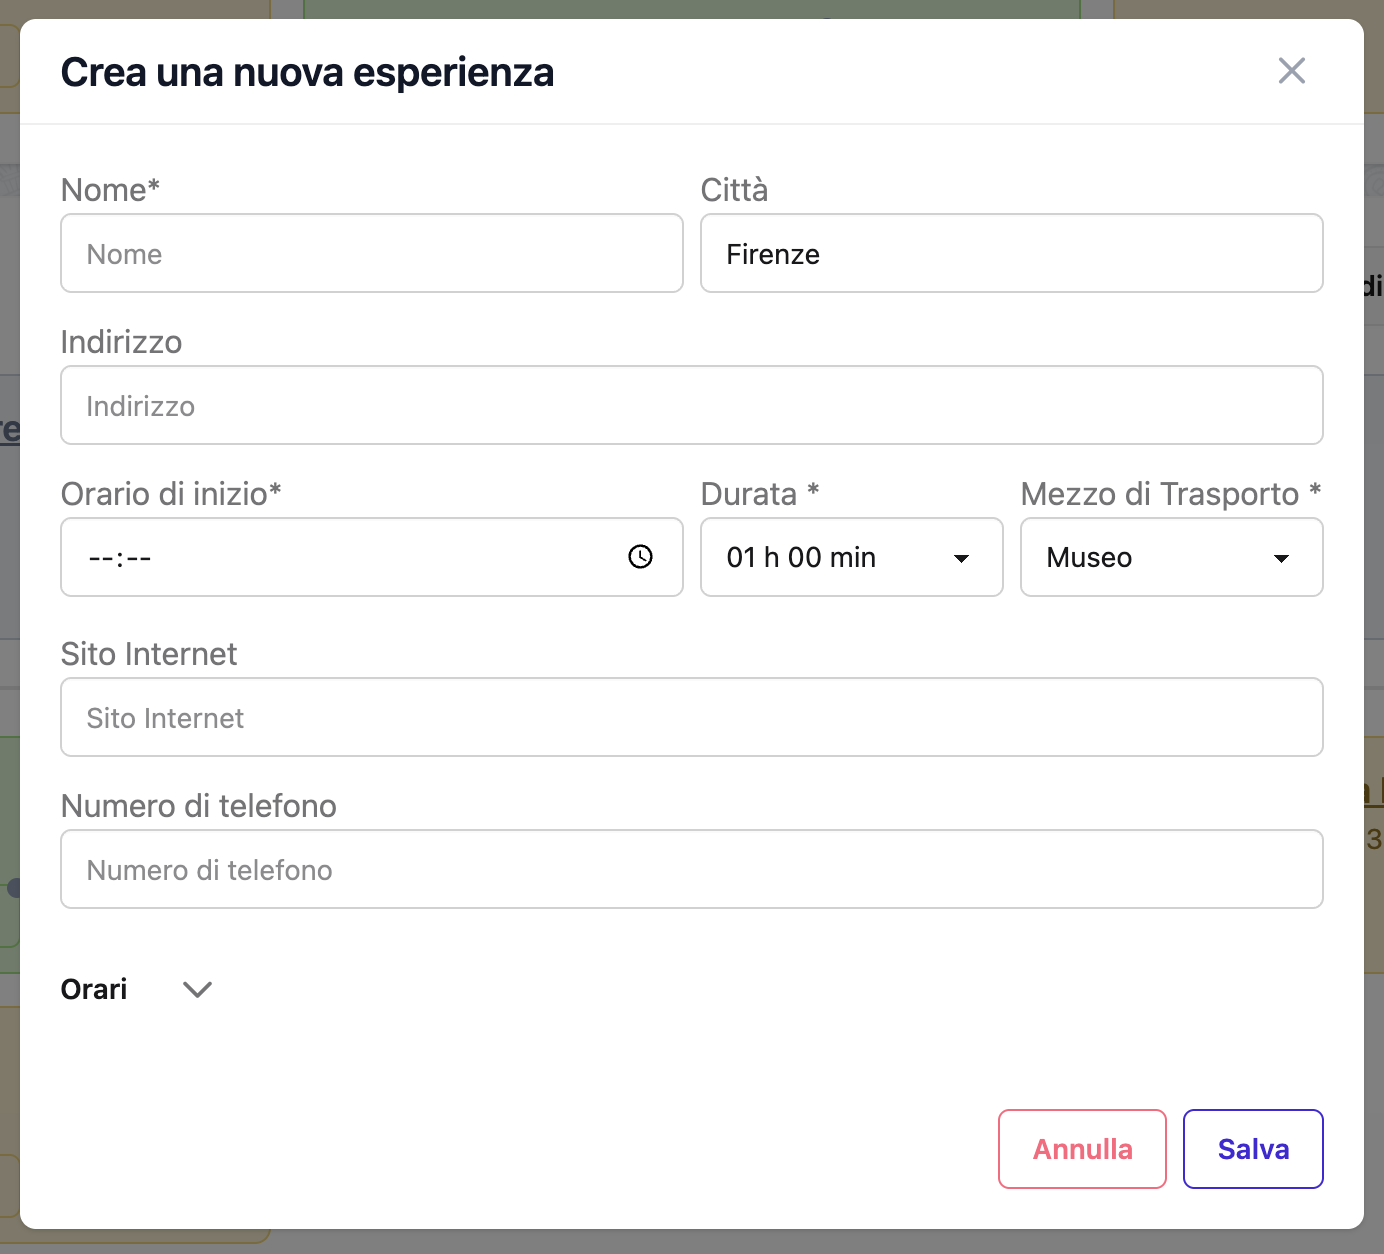 The experience creation form
- Click Add Experience
- Fill in details:
- Name: "Colosseum Tour"
- Category: Museum/Attraction
- Start Time: 16:00
- Duration: 2 hours
- Address: "Piazza del Colosseo, 1, 00184 Rome"
- Price: 25€ (optional)
- Confirmation: "COL202503141600" (optional)
-
Notes: "Guided tour. Skip-the-line ticket. Meeting point: main entrance"
-
Click Save
4.2 Saturday Morning - Roman Forum
- Navigate to Day 2 (Saturday)
- Click Add Experience
- Fill in details:
- Name: "Roman Forum and Palatine Hill"
- Category: Museum/Attraction
- Start Time: 09:30
- Duration: 3 hours
- Address: "Via della Salara Vecchia, 5/6, 00186 Rome"
-
Notes: "Included in Colosseum ticket. Wear comfortable shoes!"
-
Click Save
4.3 Saturday Afternoon - Trevi Fountain Walk
- Click Add Experience
- Fill in details:
- Name: "Trevi Fountain and Spanish Steps Walk"
- Category: Walk/Exploration
- Start Time: 15:00
- Duration: 2 hours
-
Notes: "Bring coins for the fountain!"
-
Click Save
4.4 Sunday Morning - Vatican Museums
- Navigate to Day 3 (Sunday)
- Click Add Experience
- Fill in details:
- Name: "Vatican Museums and Sistine Chapel"
- Category: Museum/Attraction
- Start Time: 09:00
- Duration: 3.5 hours
- Address: "Viale Vaticano, 00165 Rome"
- Price: 17€
-
Notes: "Book in advance. Last Sunday of month is free but crowded."
-
Click Save
Step 5: Add Meals
5.1 Friday Dinner
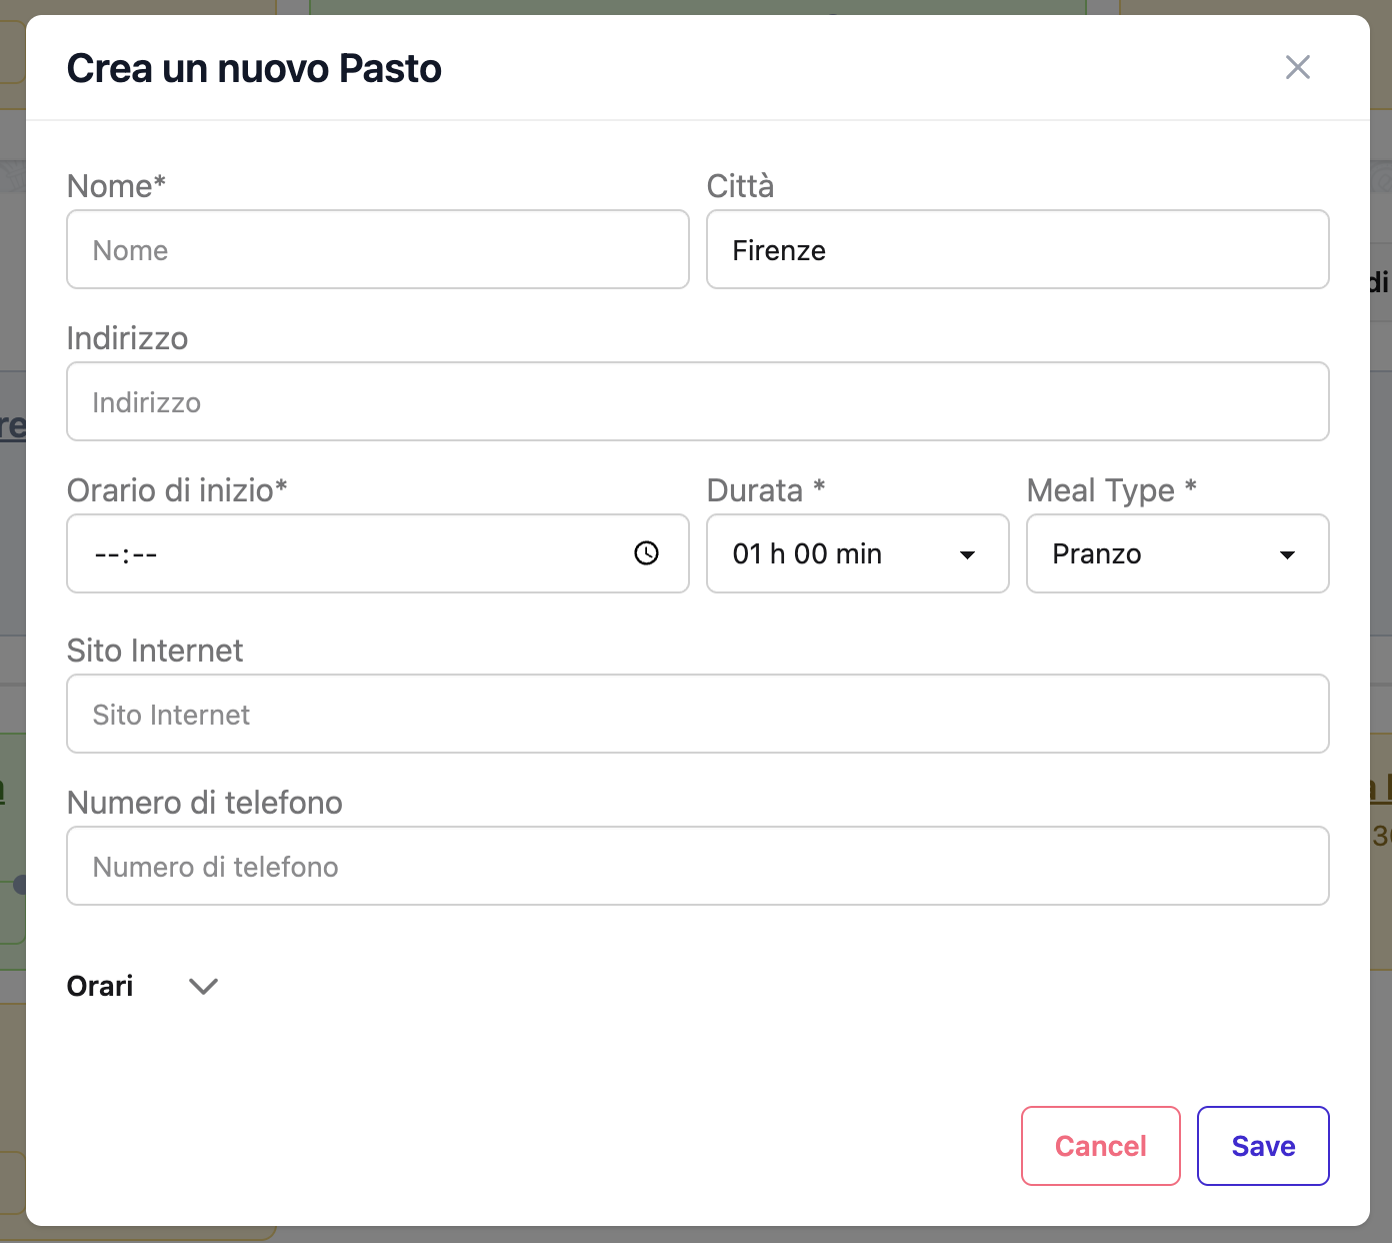 The meal creation form
- Navigate to Day 1 (Friday)
- Click Add Meal
- Fill in details:
- Name: "Trattoria da Enzo"
- Cuisine Type: Italian
- Meal Type: Dinner
- Start Time: 19:30
- Address: "Via dei Vascellari, 29, 00153 Rome"
- Reservation: Yes
-
Notes: "Traditional Roman cuisine. Try the cacio e pepe!"
-
Click Save
5.2 Saturday Lunch
- Navigate to Day 2 (Saturday)
- Click Add Meal
- Fill in details:
- Name: "Roscioli"
- Cuisine Type: Italian/Deli
- Meal Type: Lunch
- Start Time: 13:00
- Address: "Via dei Giubbonari, 21, 00186 Rome"
-
Notes: "Famous bakery and deli. Try the pizza bianca!"
-
Click Save
5.3 Saturday Dinner
- Click Add Meal
- Fill in details:
- Name: "La Pergola"
- Cuisine Type: Fine Dining
- Meal Type: Dinner
- Start Time: 20:00
- Address: "Via Alberto Cadlolo, 101, 00136 Rome"
- Reservation: Yes
- Confirmation: "LP20250315" (optional)
-
Notes: "3 Michelin stars. Dress code: elegant. Reserve well in advance."
-
Click Save
5.4 Sunday Lunch
- Navigate to Day 3 (Sunday)
- Click Add Meal
- Fill in details:
- Name: "Pizzarium"
- Cuisine Type: Pizza
- Meal Type: Lunch
- Start Time: 13:30
- Address: "Via della Meloria, 43, 00136 Rome"
-
Notes: "Best pizza al taglio in Rome. Near Vatican."
-
Click Save
Step 6: Add Departure Transfer
6.1 Hotel to Airport Transfer
- Still on Day 3 (Sunday)
- Click Add Transfer
- Select Simple Transfer
- Fill in details:
- Transport Mode: Taxi
- Origin: "Hotel Forum Roma"
- Destination: "Rome Fiumicino Airport"
- Departure Time: 15:00
- Arrival Time: 16:00
-
Notes: "Pre-booked taxi. Approx 50€ fixed rate."
-
Click Save
6.2 Flight Home
- Click Add Transfer
- Select Departure
- Fill in details:
- Transport Mode: Flight
- Origin: "Rome Fiumicino (FCO)"
- Destination: "London Heathrow (LHR)"
- Departure Time: 18:00
- Arrival Time: 19:45
- Confirmation: "BA234567"
-
Notes: "British Airways BA501. Seat 15C."
-
Click Save
Step 7: Review Your Itinerary
7.1 View the Complete Trip
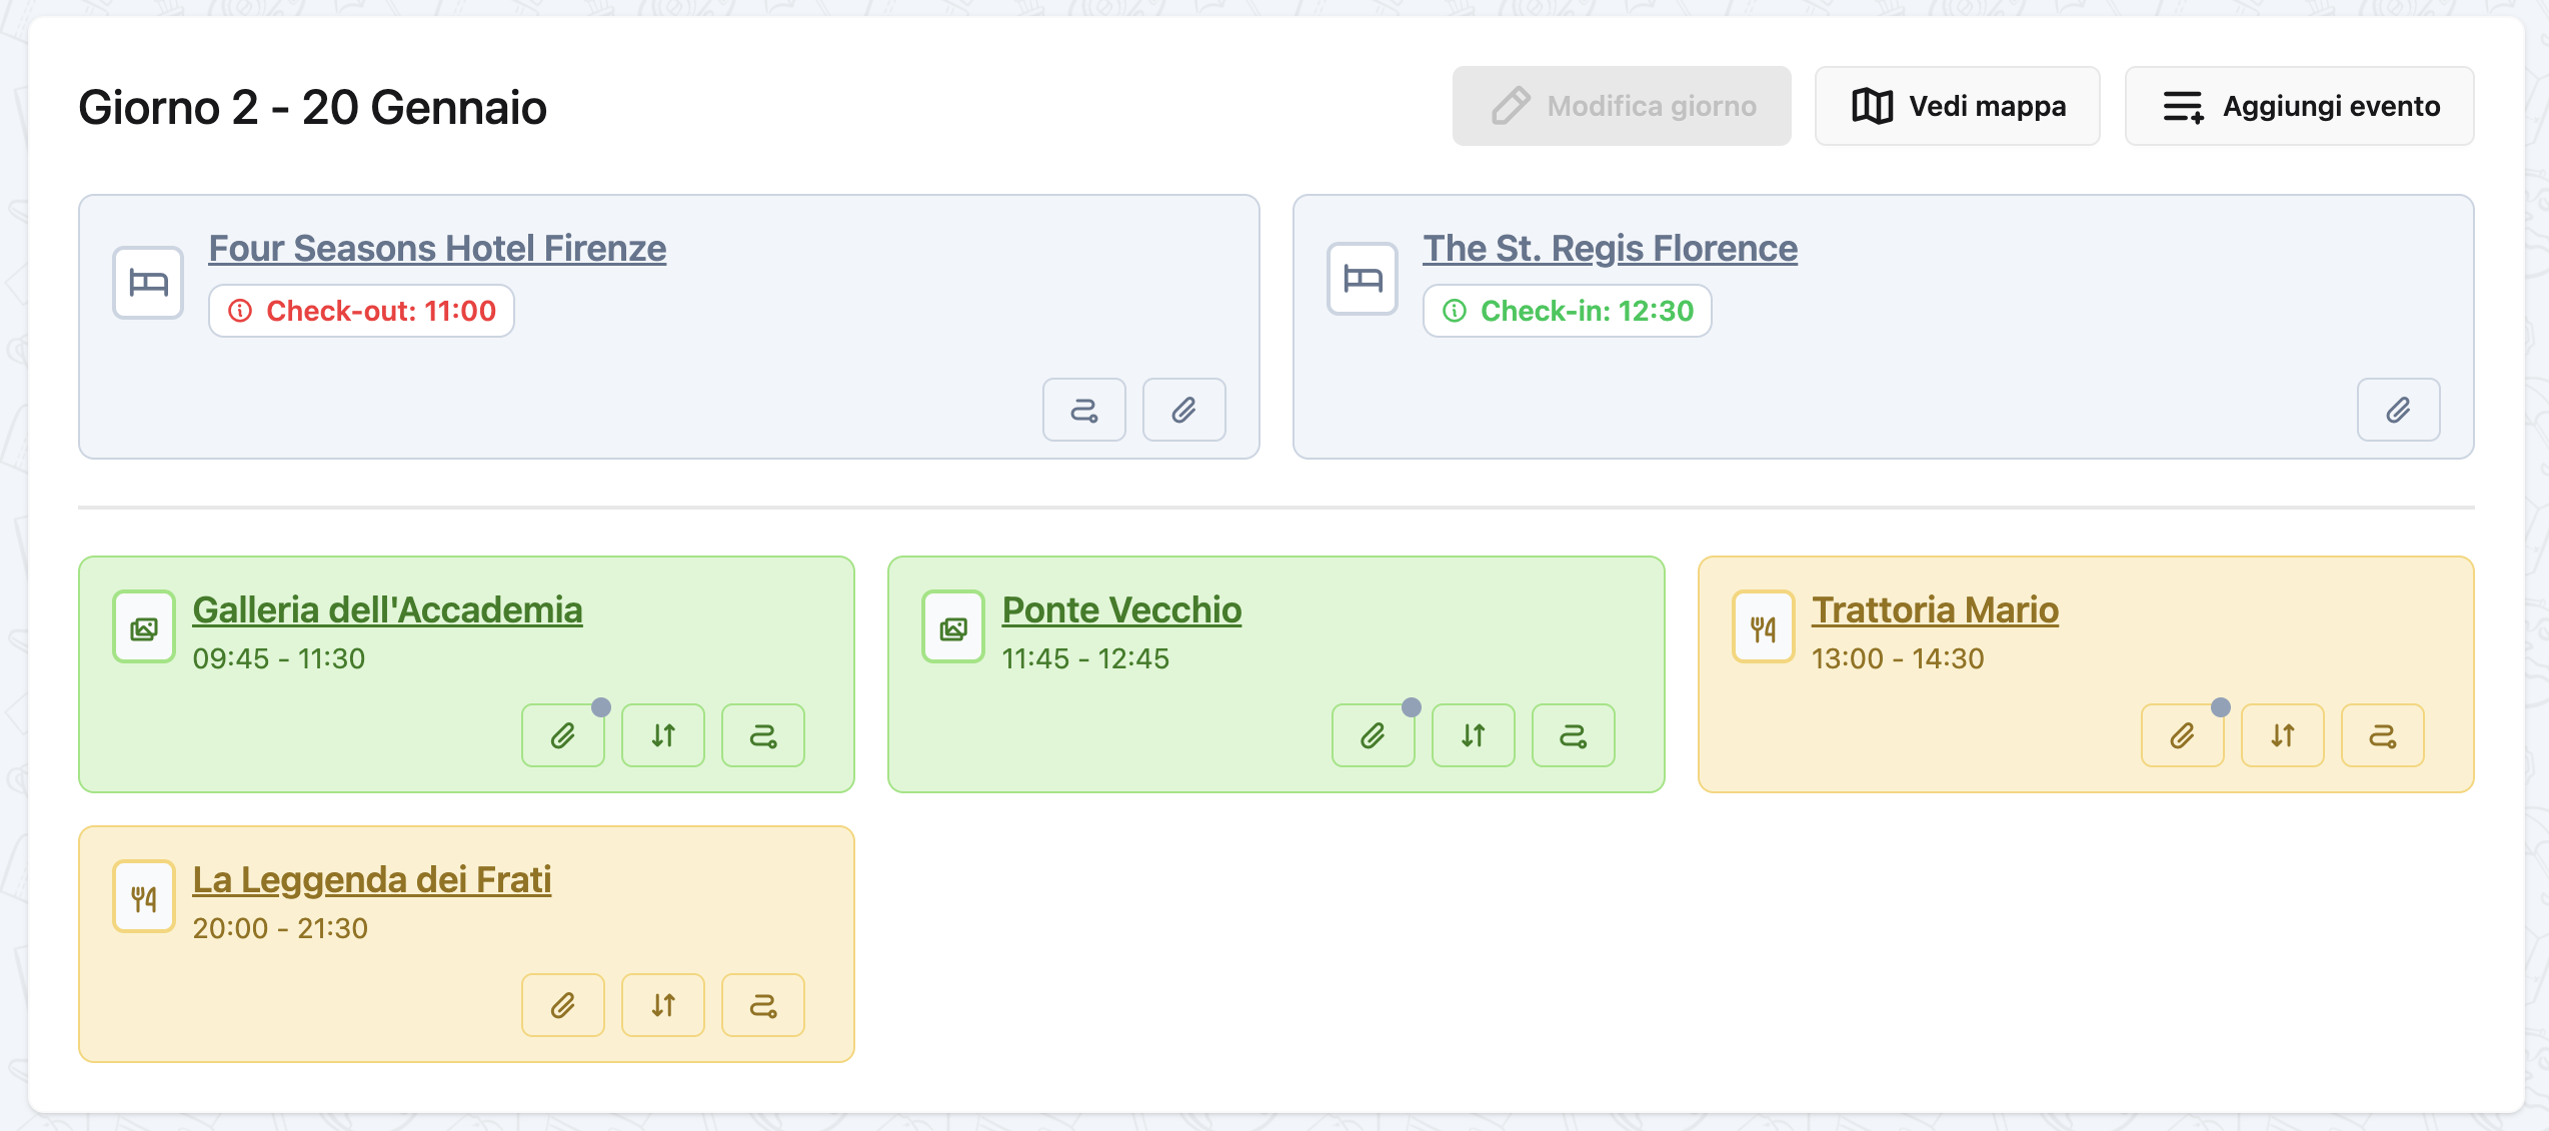 A day with all its events
- Click on the trip name to go back to the trip overview
- You should now see:
- 3 days with automatically generated dates
- 1 stay spanning all 3 days
- Multiple experiences, meals, and transfers organized by day
- Events displayed in chronological order
7.2 Check for Overlaps
The system automatically detects time conflicts. If you see a warning icon next to an event, it means there's a time overlap with another event on the same day.
Time Conflicts
Review any overlapping events and adjust times as needed to avoid conflicts.
7.3 View Day Details
Click on any day to see:
- All events for that day in timeline format
- The accommodation (if any)
- Event details with expand/collapse functionality
Step 8: Make Edits and Adjustments
8.1 Edit an Event
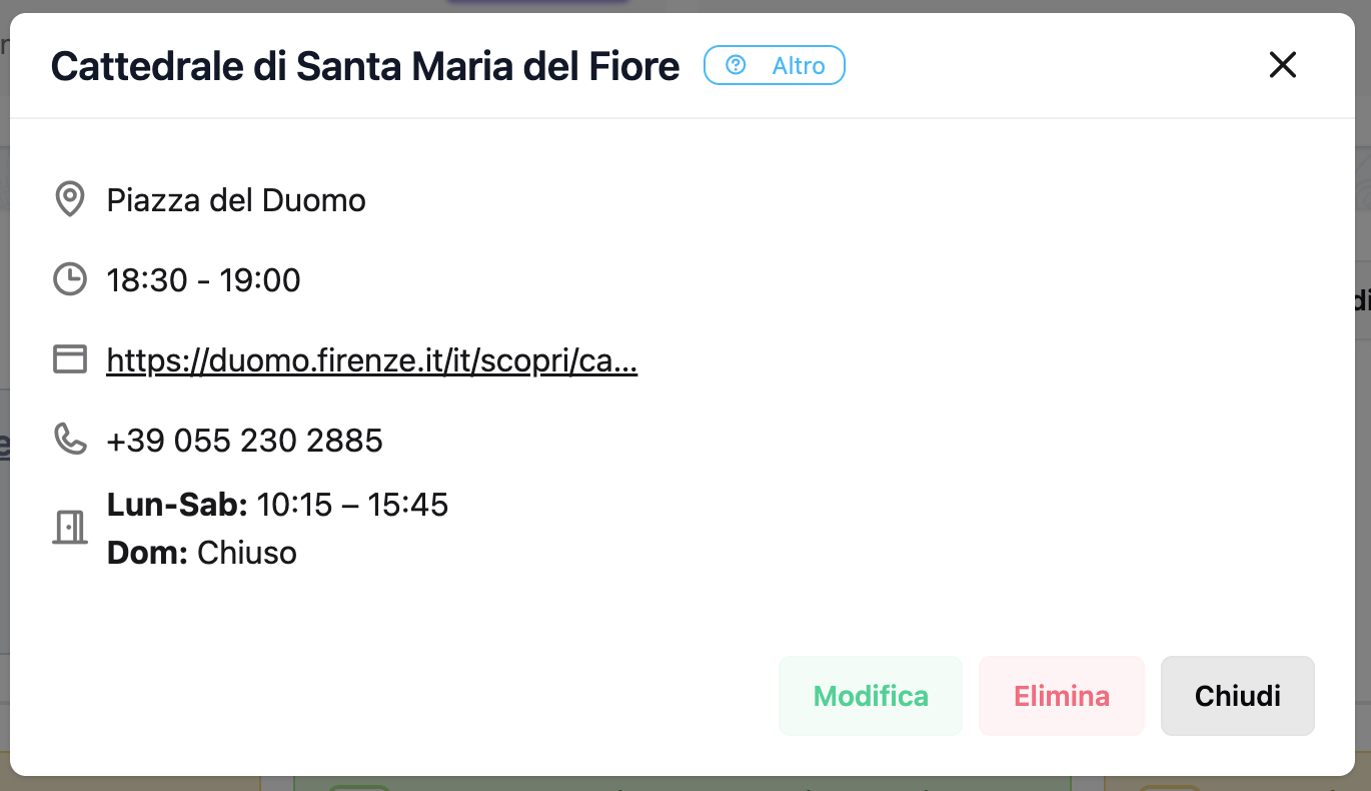 Event detail modal with edit options
- Click on any event card
- Click the Edit button
- Make your changes
- Click Save
8.2 Delete an Event
- Click on any event card
- Click the Delete button
- Confirm deletion
8.3 Move an Event to Another Day
- Edit the event
- Change the Day field to a different day
- Save
Unpaired Events
You can also leave an event unpaired (no day assigned) and assign it later.
Step 9: Add Trip Links (Optional)
9.1 Add Useful Links
- Go to the trip overview
- Click Add Link
- Add links such as:
- Flight confirmations
- Hotel booking confirmations
- Restaurant reservation emails
- Tour booking pages
- Travel guides
Example: - Title: "Colosseum Ticket" - URL: "https://www.coopculture.it/..." - Description: "Skip-the-line ticket confirmation"
Congratulations!
You've successfully created your first complete trip in Organize It! You now know how to:
- ✅ Create trips with dates and images
- ✅ Add multi-day accommodations
- ✅ Add arrival and departure transfers
- ✅ Plan experiences and activities
- ✅ Add restaurant reservations
- ✅ View your complete itinerary organized by day
- ✅ Edit and manage events
What's Next?
Explore more features:
- Trip Statuses: Learn how trips automatically update status (see Trips Guide)
- Google Places Integration: Auto-fill location details (see Experiences Guide)
- Maps Integration: View events on a map (see Transfers Guide)
- Favorites: Mark your favorite trips with a star
Tips for Better Trip Planning
Plan in Stages
- Create the trip skeleton (dates, accommodation)
- Add major transfers (flights, trains)
- Add must-see experiences
- Fill in meals and other activities
- Review and adjust for timing
Use Notes
Add detailed notes to events: - Confirmation numbers - Booking references - Special instructions - Tips and recommendations
Check Times
Always verify: - Event durations are realistic - Travel time between locations - Opening hours of attractions - Restaurant reservation times
Leave Buffer Time
Don't over-schedule! Leave gaps for: - Unexpected delays - Spontaneous discoveries - Rest and relaxation
Happy travels! ✈️🏛️🍝